It’s well and truly time to do a follow-up to Part 1 of our blog on vehicle workflow, in which I’ll be giving an overview of vehicle interior modeling and texturing. All of the methods applied in Part 1 are very much applicable, so I recommend reading it first:
A-look-at-vehicle-workflow-Part-1 It covers many of the tricks involved in vehicle art creation quite comprehensively, so I won’t repeat them here - this part will be somewhat shorter.
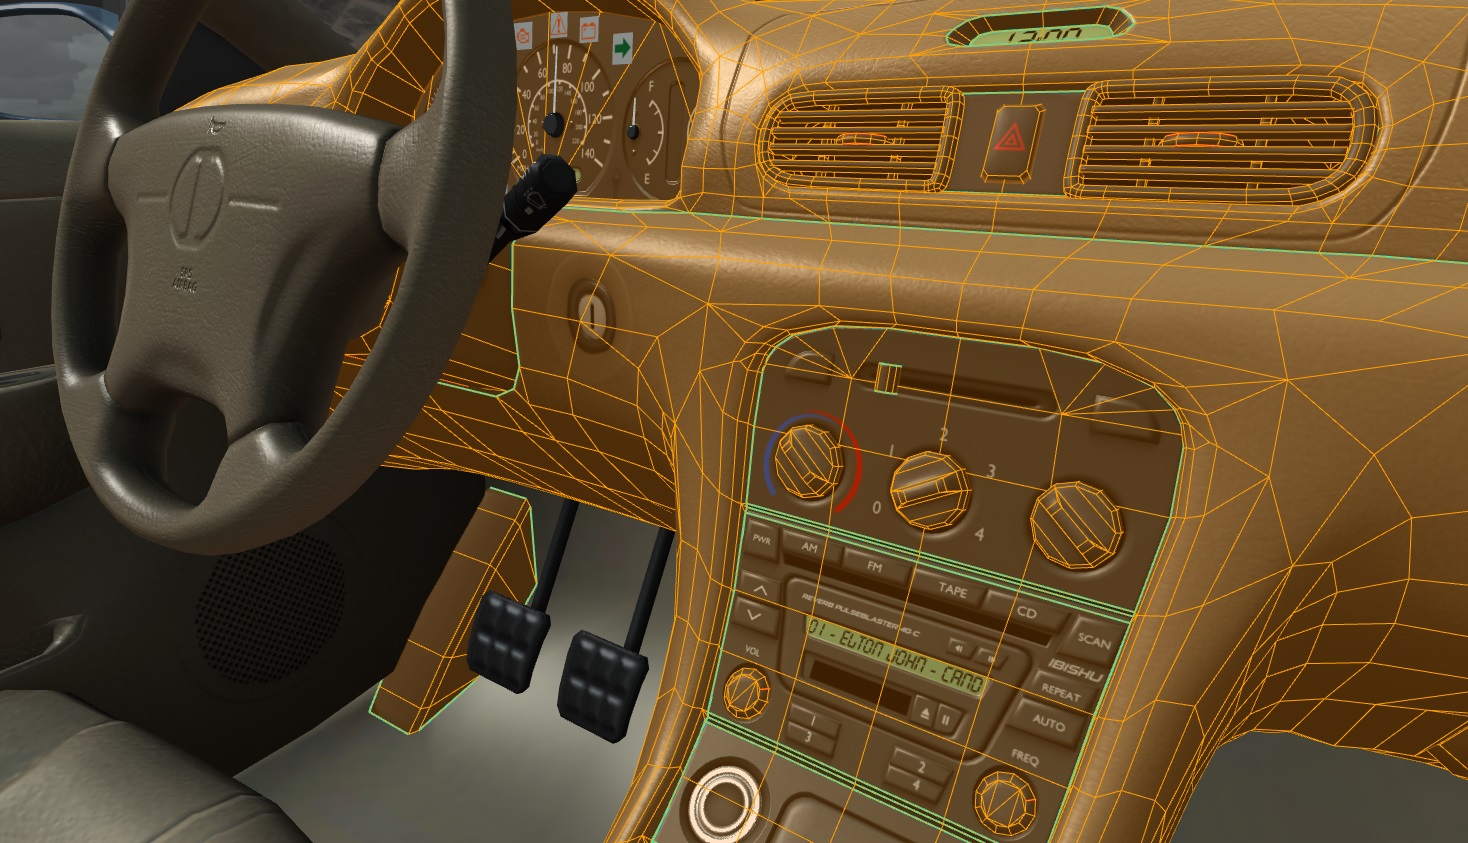
Starting the interior of a car can be a bit daunting without any reference markings, so it’s best to draw up a series of lines marking out the the edges of the door panels and centre console first. You can use these markings to locate the steering wheel position, which dictates the position of the seats and some dashboard features.
With this location pinned down, you can start modeling the dashboard and door panels. In many cars the dash is symmetrical from the drivers to the passengers side, with the exception of the gauge cluster. I typically keep a symmetry modifier on the mesh until I am reasonably happy with the overall shape, and then go about working on the unique geometry for each side. It’s also helpful to place a camera at the location of the driver’s head, so you can easily check the in-game PoV at any time.
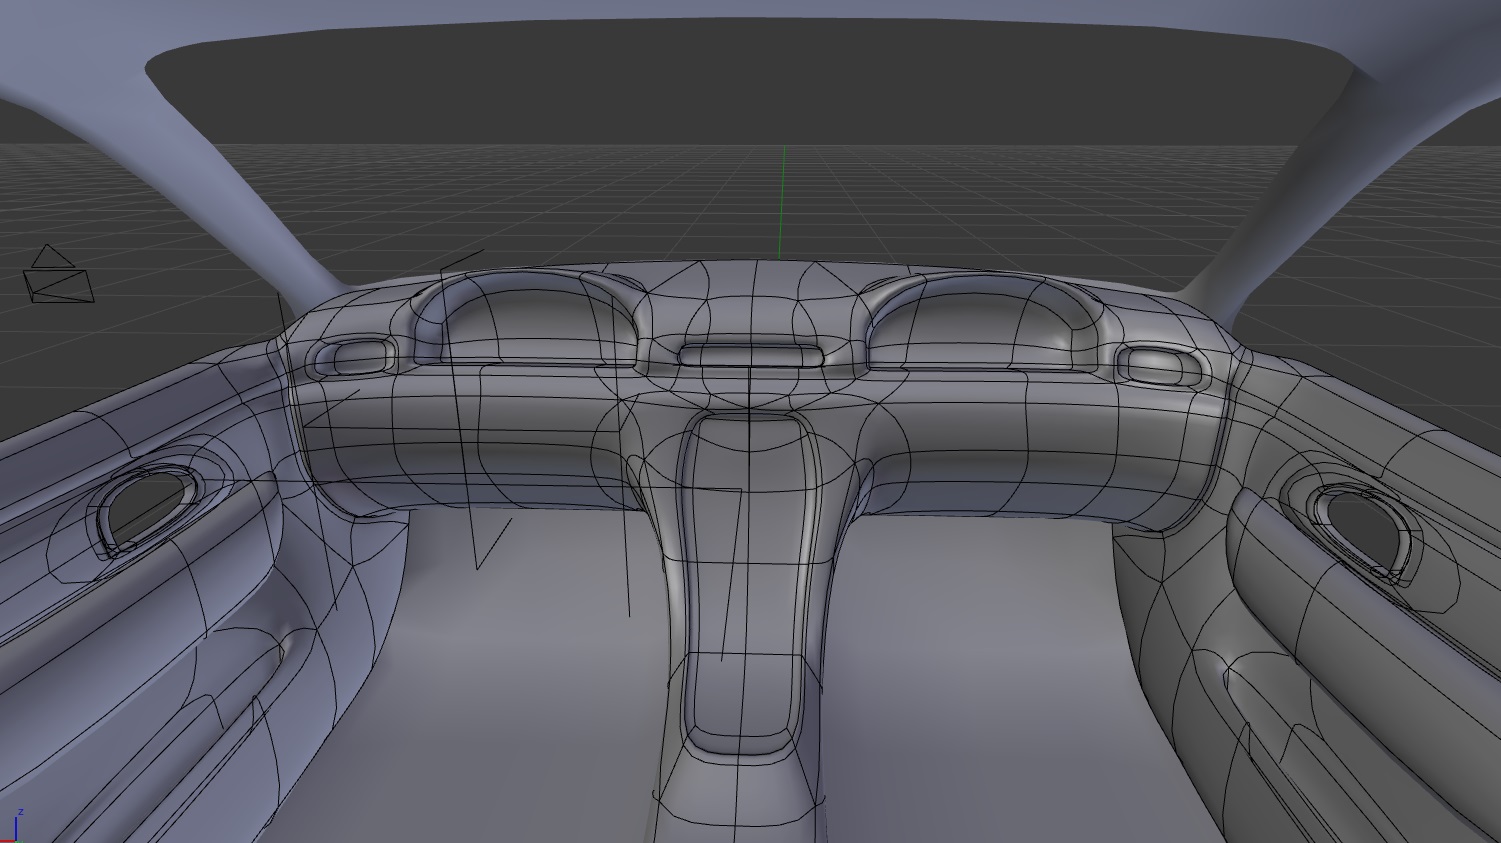
As you can see above, I like to use subsurface smoothing (Turbosmooth for the 3dsMax users) during the early modeling phase, especially with very curvy interiors like the Pessima’s. This is an unconventional workflow, but can be quite helpful for guaranteeing consistent curves, assuming the base mesh is very low-poly.
Below you can see the base mesh without any subsurface smoothing(left), with no more than about 500-600 triangles. This of course looks awful, but fortunately you won’t have to look at it if you keep the subsurf modifier visible while modeling. Instead you’ll see the nicely subsurfed mesh on the right:
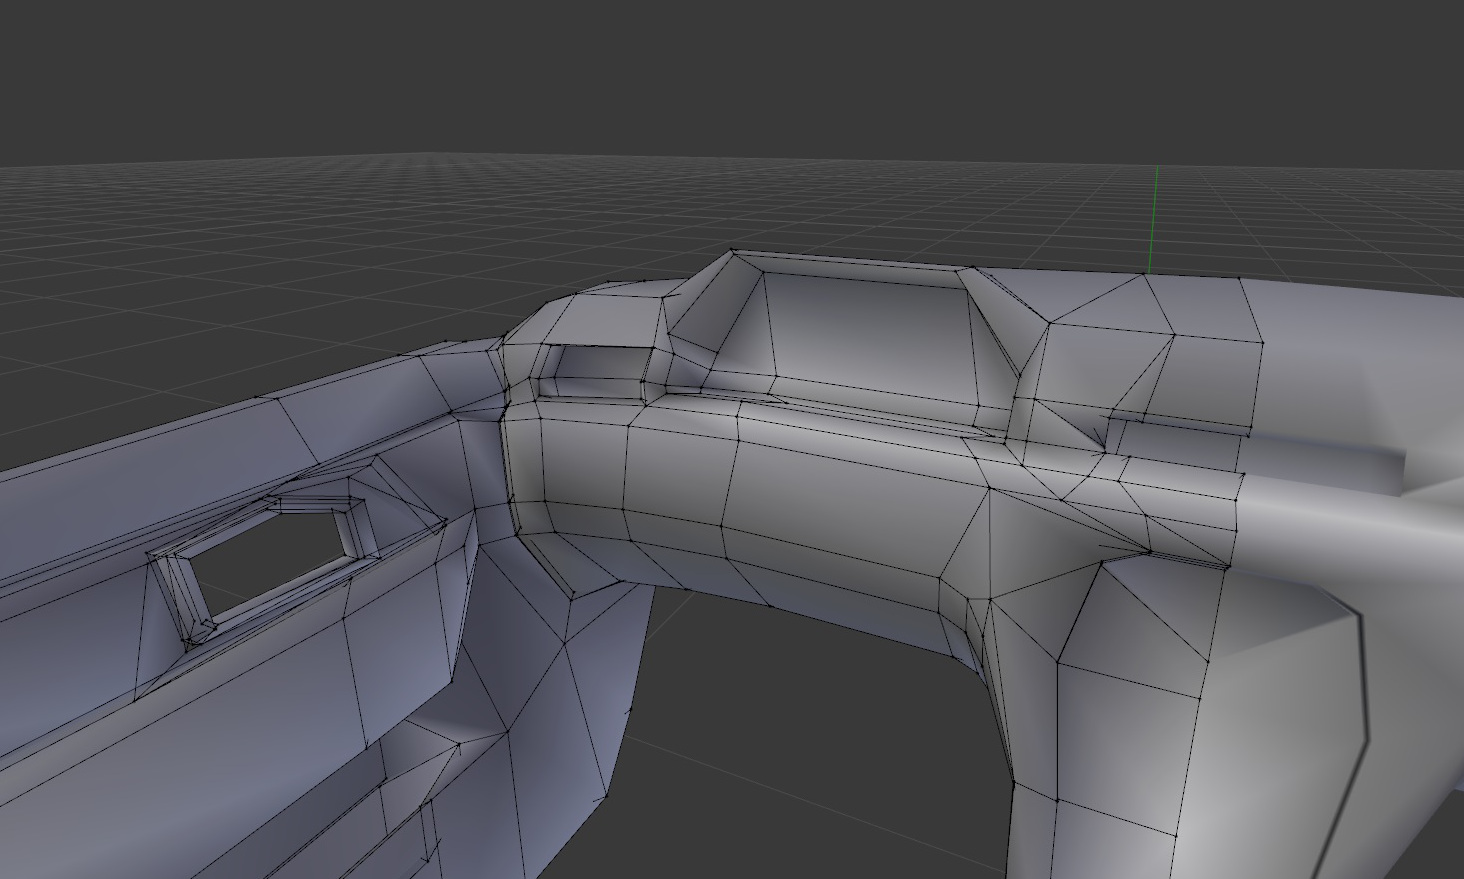
The door panels can be started by extruding the existing edge loop from the external door mesh. Make sure to give the panels significant thickness to avoid clipping with the outer door mesh in a crash.
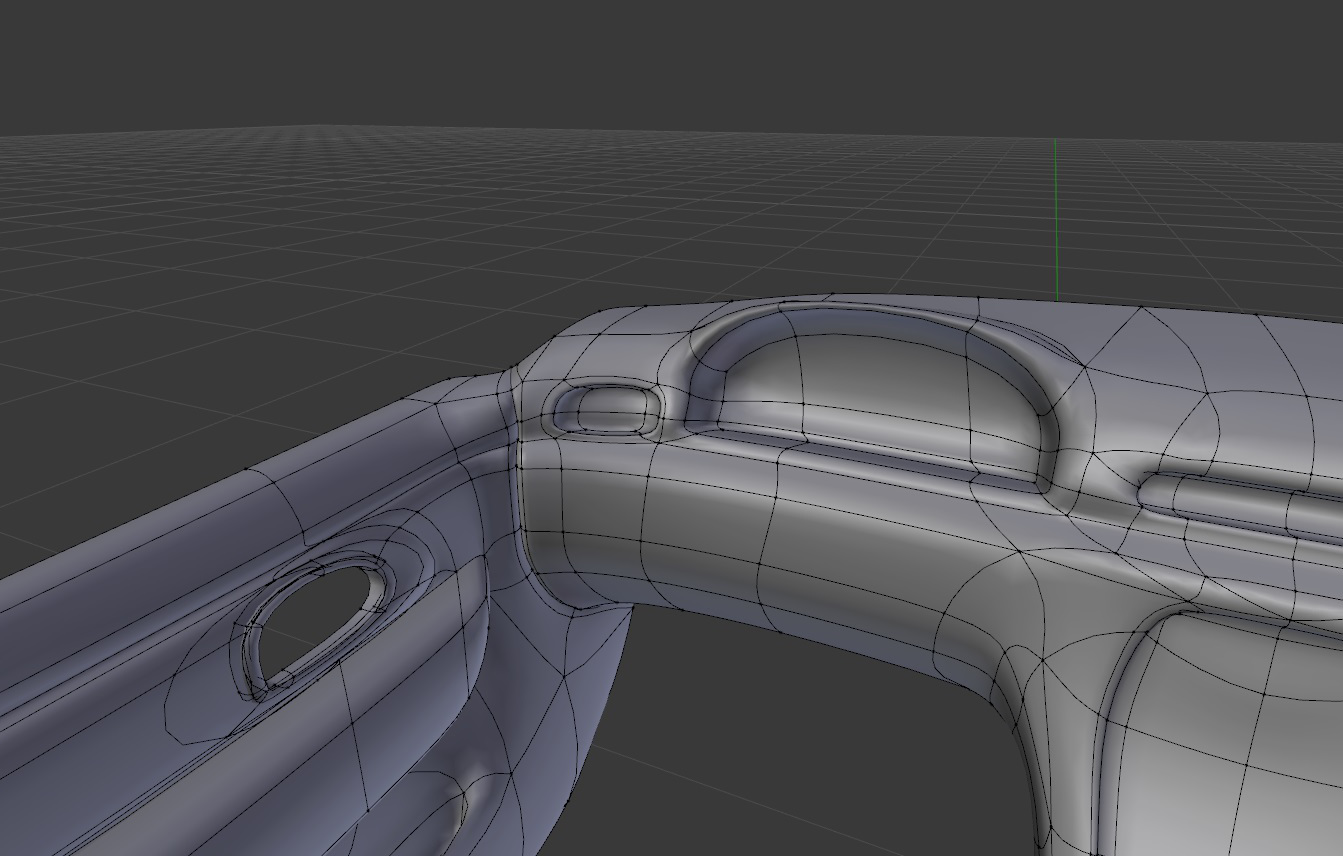
Once you’re happy with the shape, apply a single-pass subsurf modifier and watch your polygon count quadruple. You may want to merge some superfluous edge loops at this point to keep the geometry light and clean. At this point the finer details can start to be added. These include vents, door handles, knobs and asymmetrical details. As always, avoid adding geometry except where it’s needed to control shading. some concave features like vents and cup-holders need an additional ring of edges around them to avoid disturbing the shading on the main surface hosting them.
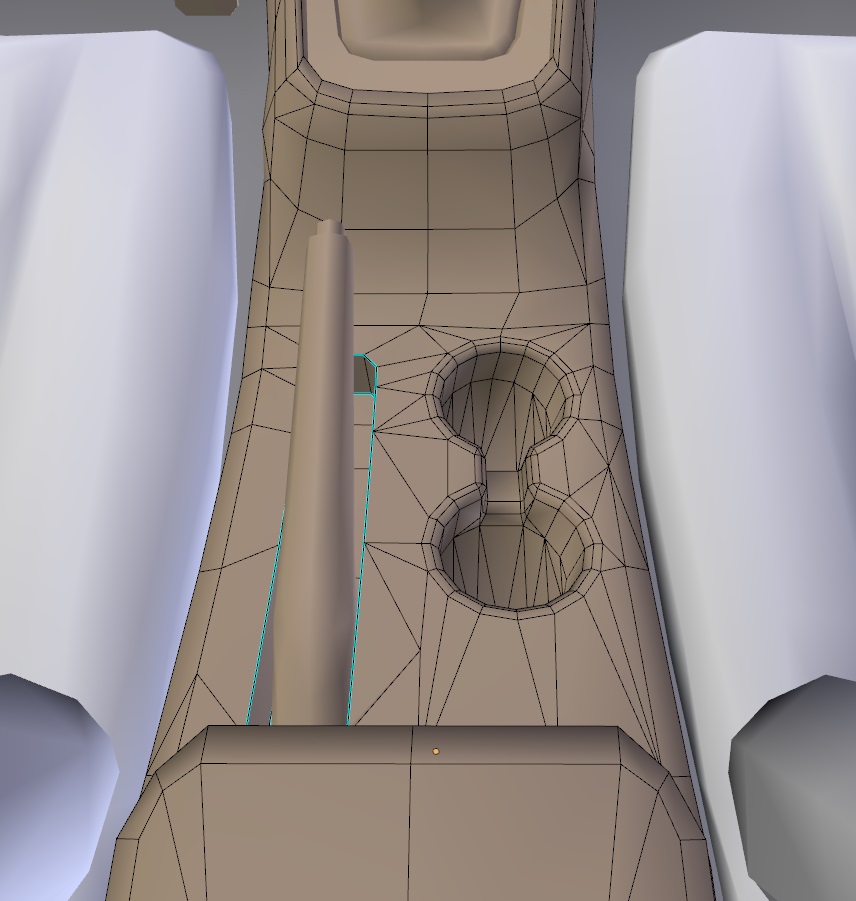
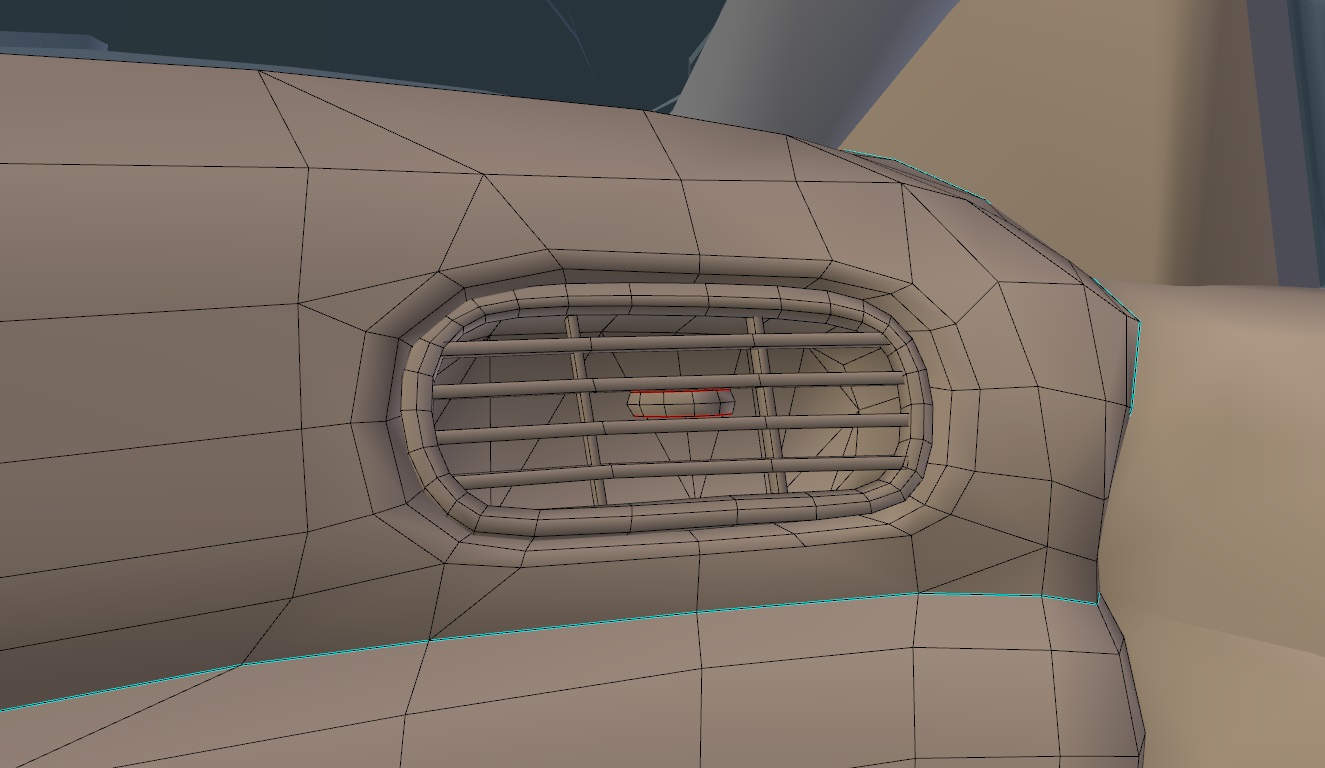
Sometimes it’s necessary to use triangles instead of quads, but be careful that they don’t result in poor shading. Reducing geometry by merging edges can often be a more effective means for smoothing out the appearance of a model than adding polygons, and this will be especially true once a high-poly smoothed normal map is baked on.
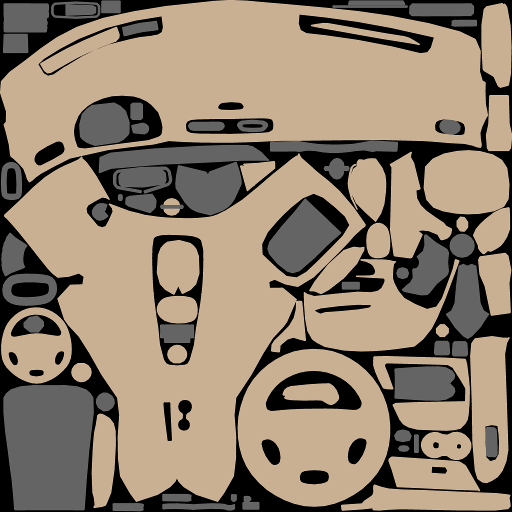
UV mapping the interior is all about finding continuous surfaces and unwrapping them in such a way that seams are either not visible, or occur at the edges of materials. For very curvy interiors this can result in some pretty unusual UV layouts. Once the UV layout is finished the first thing I do is bake an ambient occlusion pass onto the texture. This is a helpful starting point since it will be used in almost all of the texture layers. Bake the AO with a subsurf modifier for extra smoothness. Note that any parts that can move or rotate may look wrong with AO applied unless they are first separated from nearby occluding objects (see the steering wheel in the middle-left image below for an example - this had to be re-baked afterwards).
Next, it’s a good idea to bake a colour-coded map of material types and keep it on a hidden layer in your working file, so you can easily select everything using a particular material when creating the texture.
The official cars currently use 2048x2048 interior textures, which we think is a suitable middle ground between quality and loading speed. Nevertheless, we work on textures at 4096x4096 to preserve their quality during editing, and to allow future-proofing.


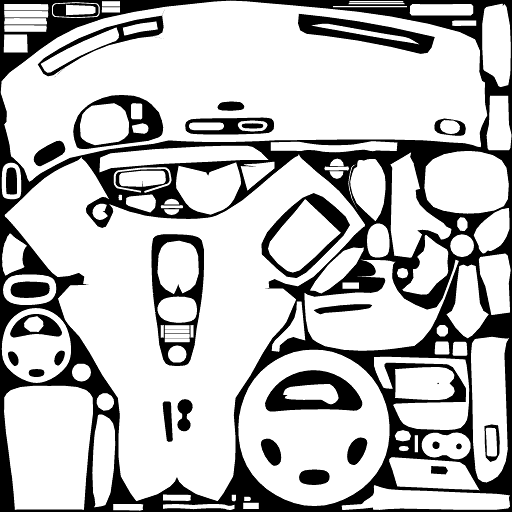
Now bake on the normal map, also using a subsurf modifier. To give the edges of UV islands some extra pop, you can also overlay a UV-island based bevel map. Simply render out the UV islands in white (above, right) in very high resolution, apply some Gaussian blur and run a normal map filter to create well-defined normal map edge bevels.
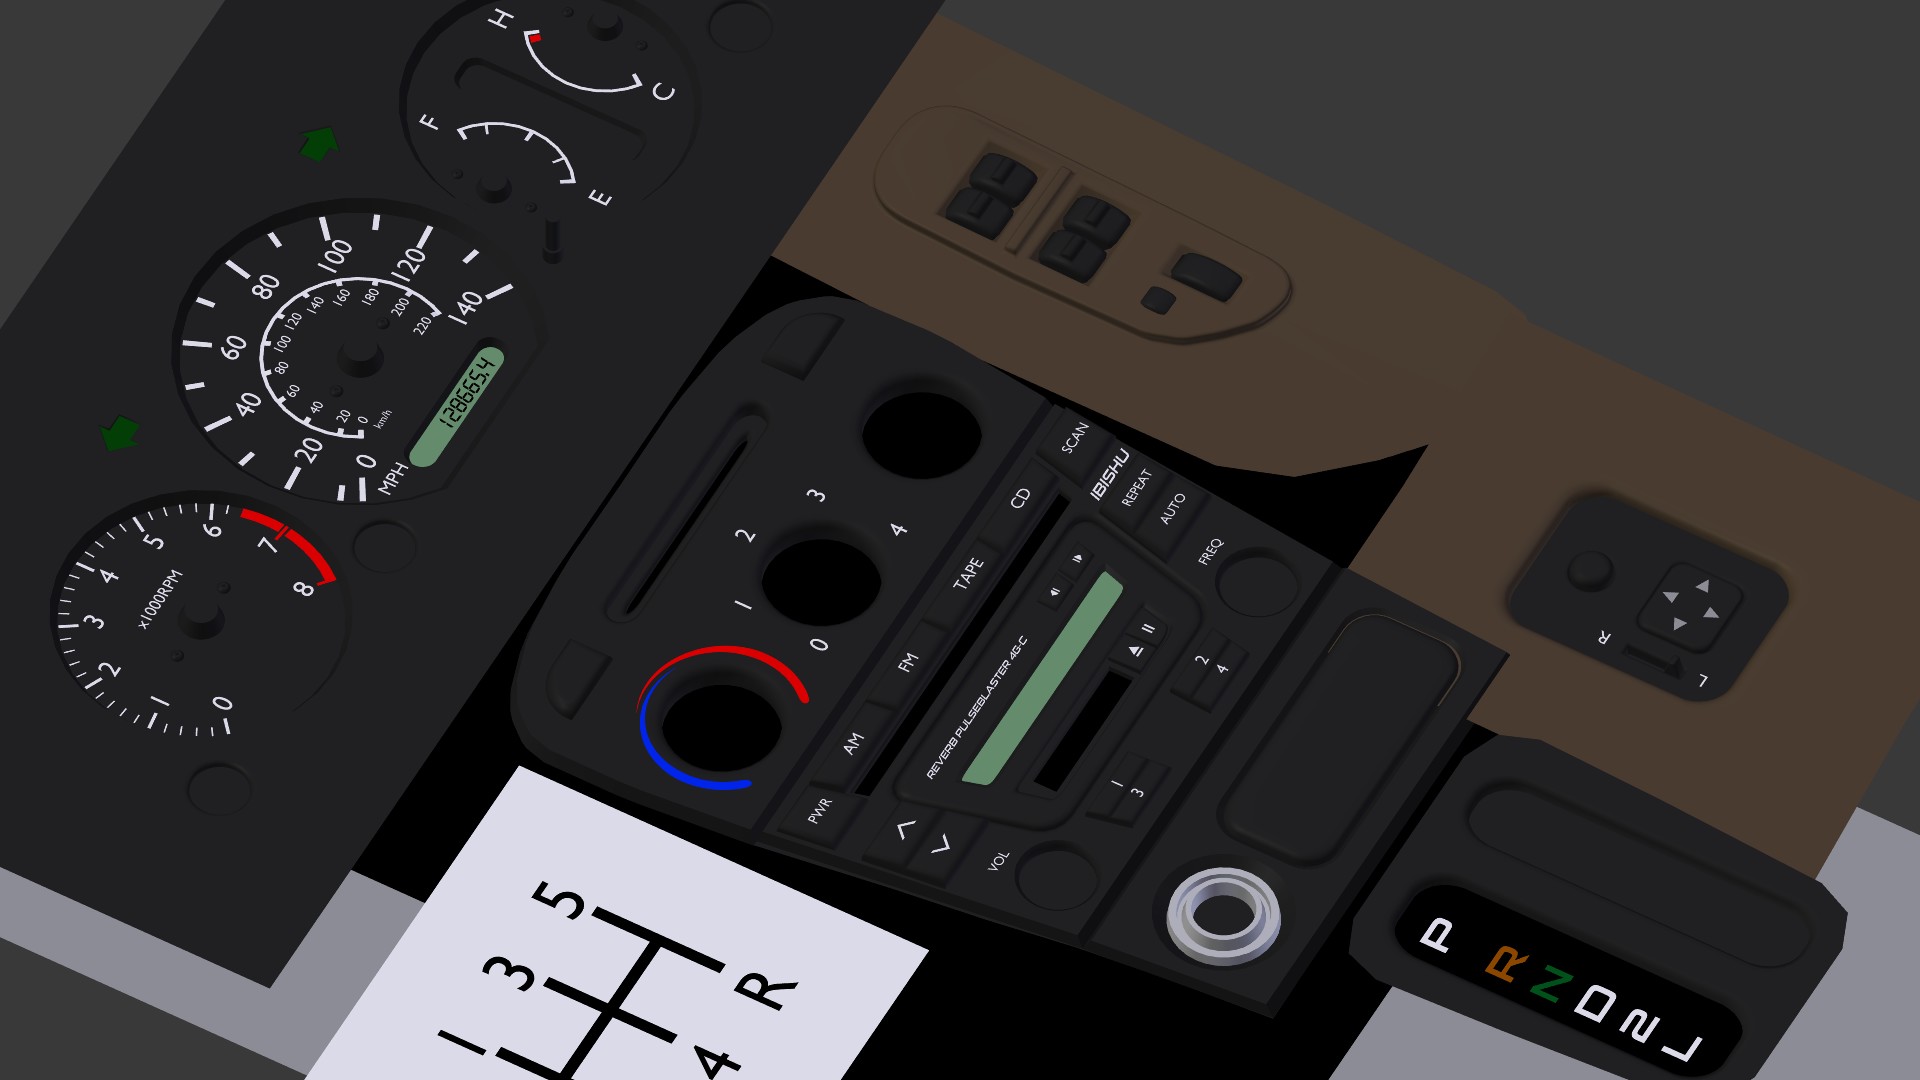
Some details are too small to be included in the mesh geometry, but can be modeled separately and baked as normal and diffuse maps onto the main texture. I group these in a new layer and use them to bake temporary textures, before baking these textures onto the main interior textures. In Blender, you can use two UV layers to manage this: one UV layer is for the temporary detail textures (stereo, A/C unit, power window controls), and another UV layer is for the main texture, which the details will be baked to.


A specular map can generally be derived from the diffuse map, with some special overlays to account for differences in materials or adding grunge spots. For a subtle lighting effect that gives the diffuse textures a photo-like quality, the normal map can be converted to greyscale and faintly applied as “hard light” over the main diffuse texture. Reflectivity is the inverse of the diffuse texture’s alpha map; more transparent areas are more reflective.
If you’re working in Blender it’s helpful to set up the materials for preview in the viewport. However, be aware that things can look significantly different in-game, so it’s a good idea to regularly export your work to get
a feel for how the lighting will look in BeamNG.drive.


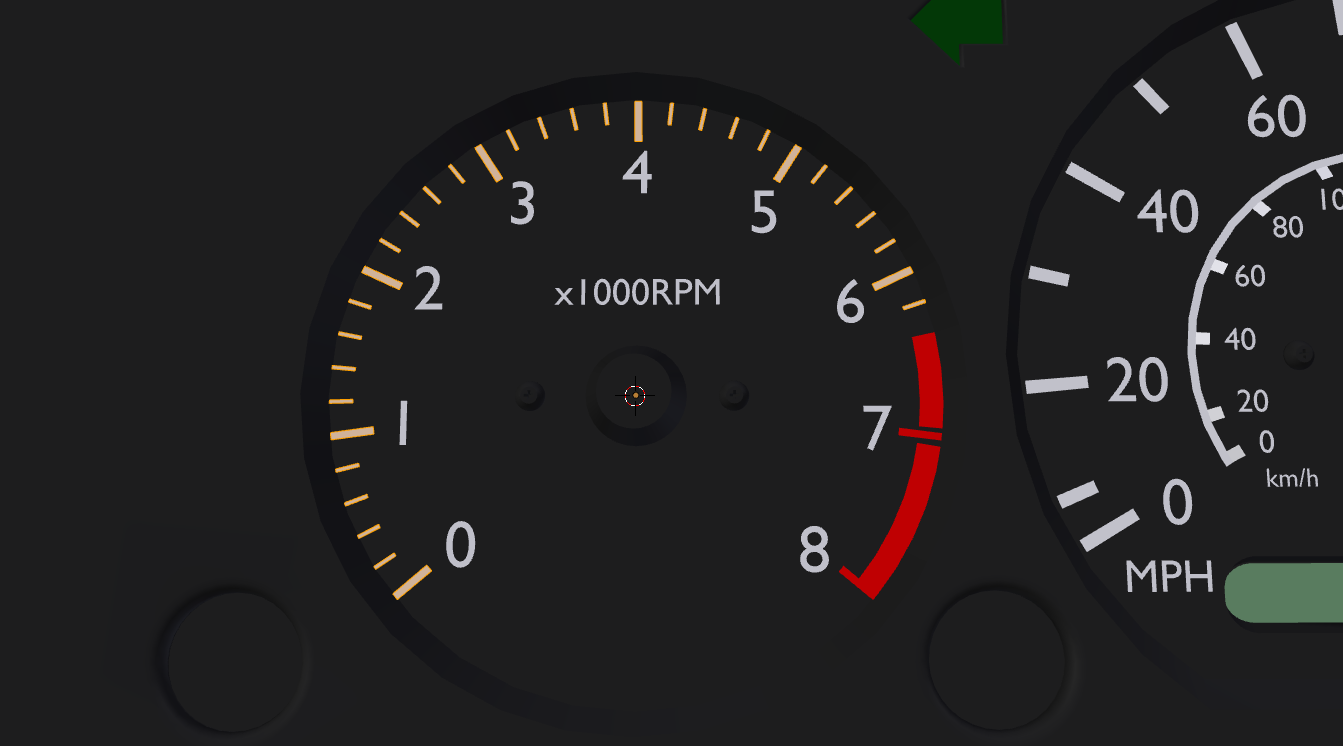
Making the gauge cluster is more of a mathematical problem than a modeling issue, and involves first figuring out the range of the speedometer, the number of interval marks , and the total angle of the needle arc from zero to max speed. Once you’ve sorted this out, it’s a simple matter of creating a single interval mark and copying it around the perimeter of the gauge, rotating it by several degrees at a time. Keep switching back to your camera in the driver’s head position to make sure the gauges are readable. The finished gauge cluster model can be rendered onto 1024x512 textures; diffuse, normal and specular, which will then be applied to a flat plane on the dashboard mesh with a unique material.


Seats can also be modeled using the 2-stage process of low-poly primitive shapes, and application of subsurface smoothing followed by refining and cleaning up the mesh. These can be assigned their own 512x512 textures. Depending on styling (more curves usually result in more geometry), the full set of interior meshes may have up to 20,000 triangles.

The process described above is certainly not the only way to create an interior (and I’ve probably offended a few modeling purists with my subsurf method), but should help shine some light on the task at hand. This year we’ve started seeing very high standards in community car mods, and I hope this helps pave the way for more fantastic user-made content.