Hello everyone! In this post I’ll show you the process I’m using to create the foliage for BeamNG’s environments.
First off I go looking for reference, it doesn’t have to be exactly the same type of tree but I’ll use this to help construct the branches later to get a feel for the shape of the tree and foliage. Just as if I were painting this it’s important to see how the light catches the various shapes which so I can replicate the form of the tree later on.
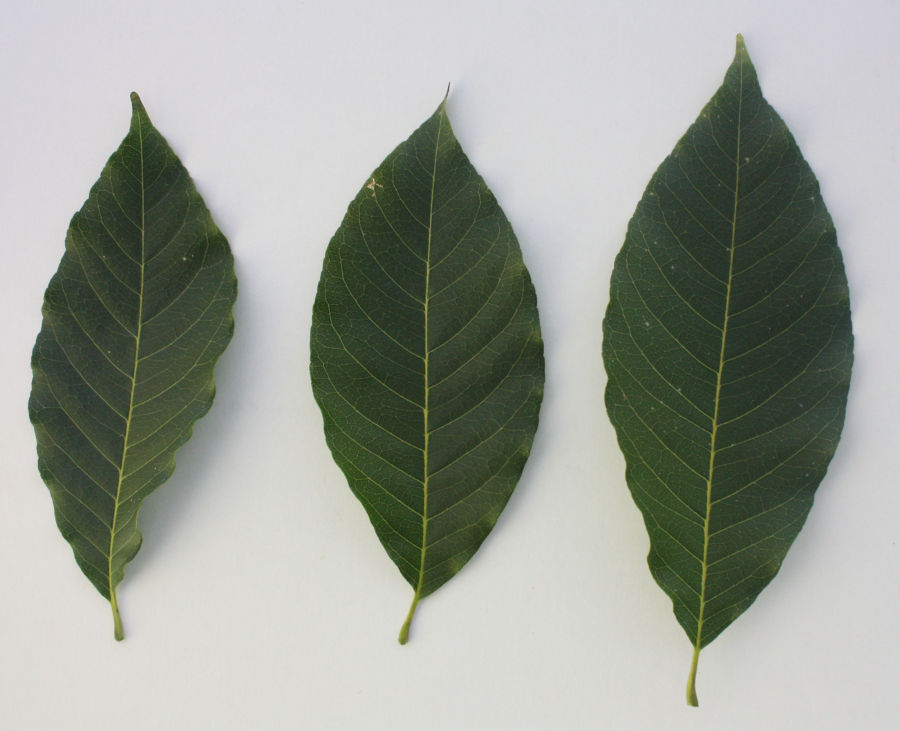
Next I find my leaves and photograph them while trying to get the most even lighting I can since the reflections and shadows on the leaves will come from the specular and normal maps.
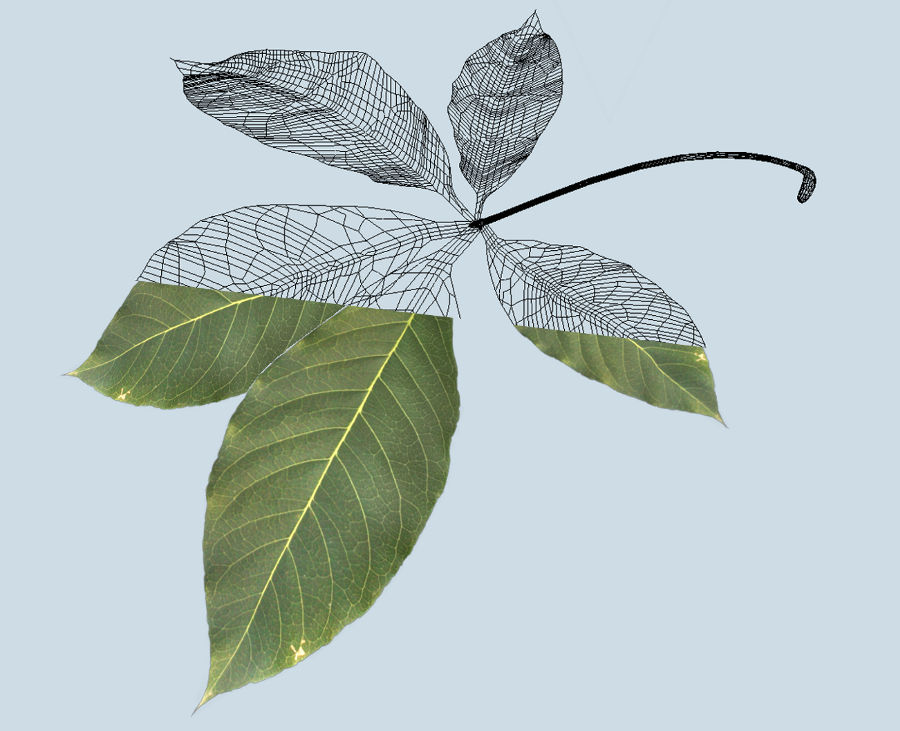
After that is done the leaves are modeled in high detail and the textures mapped to them.
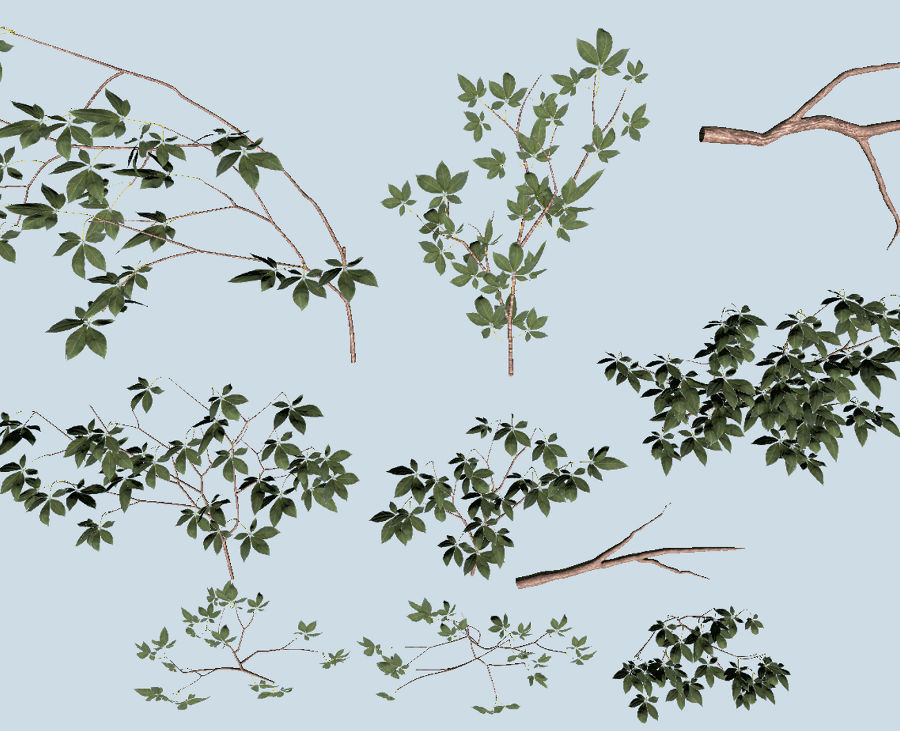
Once that is done I model some branches and then place a whole lot of leaves on them while paying close attention to my reference, I also arrange them into groups so that I can have many samples of foliage on a single texture. Here I have modeled different branches for different purposes so that the planes which are horizontal can have leaves viewed from the top/bottom and the vertical ones will be side on. When all are put together this gives the foliage a more readable form and simulates real clumps of foliage better.

Next I use the models of the foliage to render out a diffuse, a specular and a normal map. The diffuse is basically a standard photograph and is what will be “visible” in the game. The specular is for reflections and finally the normal map effectively warps the lighting to make the foliage look three dimensional. It helps to break up the flat planes these textures will sit on and make it look as though the leaves are facing different directions.
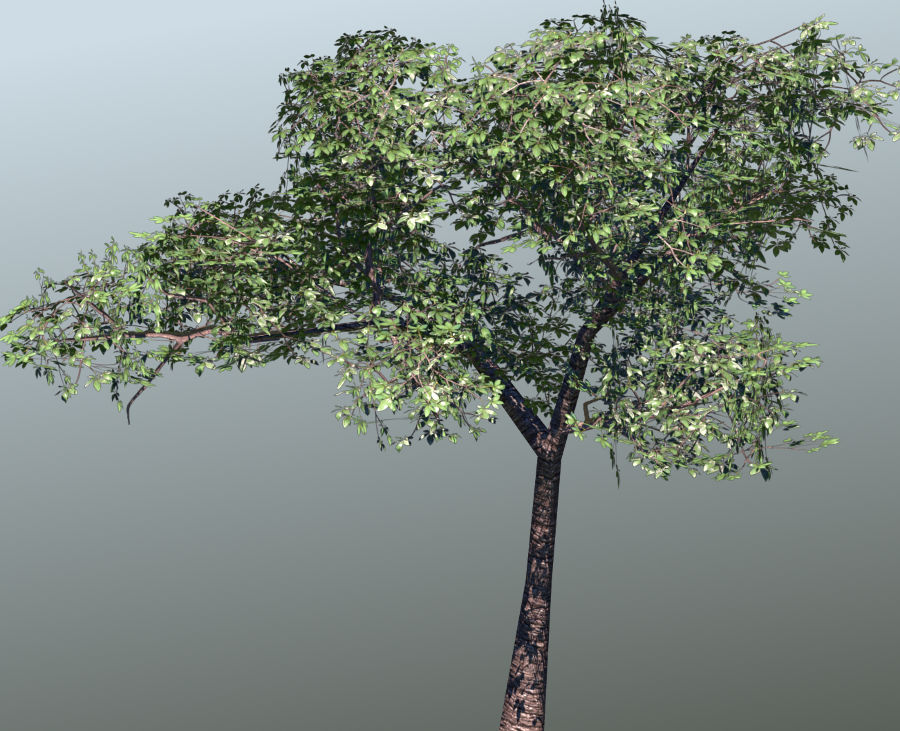
Finally I use the textures created earlier to model the tree using planes with the various foliage samples on them. With the normal and specular maps you can achieve good detail with relatively few polygons. A few other tricks are used to help reduce the complexity of the mesh such as placing the thickest samples in the center and scaling them up while the detailed clumps are used for the lowest and most visible branches. By doing this the mesh detail can be more than halved for roughly the same results.